When the time comes to repaint your deck, you don’t want to make the terrible mistake of painting over an old, chipped coat. People do this all the time, and then end up with a result that is no better than what they started out with. To avoid this undesirable outcome, most people hire a professional painting company in Cape Cod for experienced helping hands.
Still, if you plan to tackle this job and want a professional looking job, then you’d be smart to take the proper steps. This entails removing the old paint, cleaning (and maybe sanding) the deck, applying brightener, repainting or staining, and applying a nice finish.
If you’re not planning to do it the right way, then what is the point? A gritty or dirty looking paint job is just as bad a deck with weathered or chipping paint. Consider this next point and review the following step, before you make any moves towards repainting or staining your deck.
Why Strip Paint from Your Deck?
Generally, when someone has decided to strip their deck, they are preparing it for a fresh coat of paint or stain. Some people falsely assume removing the old coat is unnecessary, but that is simply not true! Getting rid of the old paint (as well as other build up and debris) will ensure the smoothest finish.
Furthermore, stripping the deck allows the fresh layer to properly adhere to the wood. In turn, the new coat will display the intended color and remain on the deck for a longer period of time. On the other hand, a rashly done job will result in a deck that looks worse than when you it started out.
When you don’t remove the old layer from the deck, the new layer will not adhere to the wood. As a result, you will notice that the new layer chips and flakes in under a year. This will probably make your deck look even worse than it did before. Not to mention, you’ll end up wasting more money and time to correct it.
Hence, it’s better to take the proper precautions upfront to make your life easier in the long run. Typically, the entire process takes a full day complete. However, the portion we are discussing below – the removal of old paint – will take about 4 hours.
Safety Precautions
When stripping paint from your deck, you should always take the proper safety precautions to avoid any unnecessary damage. This means gathering all the necessary equipment beforehand and making sure you are dressed appropriately.
Furthermore, you should avoid coming in contact with chemicals as much as possible. Also, be prepared to get wet, as some water will probably splash back at you.
What to wear:
- Long sleeved shirt and long pants
- Closed-toe shoes (preferably boots)
- Rubber gloves and safety glasses.
Secure the area:
- Remove all items from the deck. Shut all doors and windows that are in the surrounding area, to avoid water from getting inside.
- Spray the nearby siding of the house with water to help deflect any chemicals that may come in contact with it.
- Spray nearby vegetation with water and then cover it with a plastic bag until you’ve completed the process.
Proper equipment:
- Buy or rent a power washer that is no stronger than 1200 PSI.
- Use a stiff, synthetic brush for initial paint removal. Otherwise, the paint stripper will eat through the bristles of a natural brush
- If you are putting paint stripper in a bucket, make sure to use plastic as opposed to metal to avoid a chemical reaction.
- Don’t use strippers that contain methylene chloride because the chemicals are extremely harsh. Instead try one that contains sodium hydroxide or linoleum.
Once you’ve covered all your bases and taken the proper safety precautions, you can start the cleaning and paint removal process.
Clean Your Deck
You’ll have to prep your deck with a thorough cleaning before you can begin the pressure washing process. This step will help to clear or loosen the old paint on the deck. In turn, power washing and re-painting will be a much easier task. It’s recommended that you first check to see if the paint is oil based or latex based.
Check the paint type:
This is important because the oil-based paint is much tougher to get off and may need more work than a pressure washer. You can check the paint type by rubbing the wood with alcohol. If the paint comes off on the rag, its latex. If the rag doesn’t pick up any paint, it’s oil based. Once you’ve identified latex paint, you can begin the cleaning process.
Scrub the deck:
There are many kinds of deck cleaner, but any quality cleaner will do fine. Just make sure that you are following the instructions, to do the job correctly. You can apply with the cleaner with a paintbrush or through the pressure washer intake hose.
Then, grab your stiff bristled brush and scrub every inch of your deck. Some people take a scraper to their deck as well. Afterwards, follow up with mild water to rinse.
The goal is to remove any dirt, debris, build up, or old paint. During this step you should try to remove as much paint as possible before bringing out the power washer. The deck doesn’t have to be spotless, but it should look noticeably cleaner and much of the old paint should be gone or uplifted.
Now it’s time to turn on the water works.
How Much Pressure?
Don’t make the mistake of thinking more pressure is always better. Be warned that power washers are viciously strong, and it can completely destroy the wood in your deck if not used with caution. Avoid this disaster by first considering the type of wood that your deck is made of. Remember that the real power is behind the paint stripper that you are using.
Thus, make sure to get a quality paint stripping product. Still, the amount of pressure you use should depend on the type of wood that your deck is made of. Check the guidelines below:
- Soft grain wood – 600 to 800 PSI
- Standard grain – 800 to 1200 PSI
- Rough grain wood – 1200 to 1500 PSI
Keep in mind that most people do not go over 1200 PSI when power washing their deck. Especially if you are a beginner, it’s best to start out at a lower PSI. However, if you have a very tough wood and would like to use a PSI close to 1500, it’s a good idea to get the help of professional painters. In this way, you can avoid any damages or harm.
The Right Technique
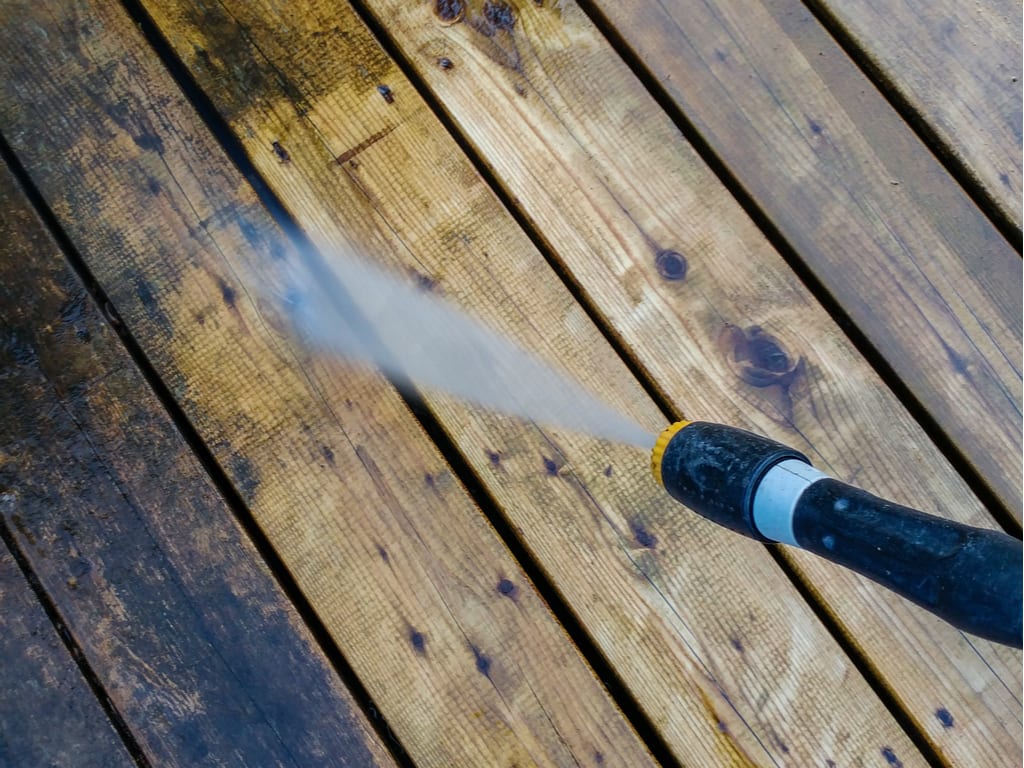
The act of power washing is not a very difficult one. However, you must always keep in mind that going overboard will result in a destroyed deck. Furthermore, the wrong method could end up leaving lap marks or even gouge the wood. So, when you are power washing your deck, remember these tips:
- When picking a nozzle, remember that the smaller the spread or fan is, the harder the blast will be.
- Keep the fan between 25 and 45 degrees for the best results. Anything higher may be a bit too mild and anything lower may be too rough.
- Hold the tip about 12 inches away from the deck and spray in a sweeping motion, following the grain of the wood.
- Start from the railings and move downward. Make the sure start at the end of the deck and move towards the stairs, saving them for last.
- Pay special attention to corners, as they are hard to clear.
Make sure to always keep the nozzle moving during this process, to avoid damaging your wood. Regardless, you will likely have to sand your deck before applying a new coat of paint anyways. But still, you should exercise caution for the best results and an easier job to do overall.
Again, it should be emphasized that if you are not a very handy person, it may be best to get help from the professionals. This is a safety measure and also a way to give you some peace of mind. All you need to do is get in touch with a company that does exterior house painting in Cape Cod, such as Total Care Painting. We specialize in interior and exterior, painting, pressure washing, and deck staining and much more.


